

How To Screen Capture In Windows Vista
[KB2727] How do I take a screenshot?
Solution
This article demonstrates how to take a screenshot which can so be attached to an electronic mail response to ESET Technical Support. Screenshots help our representatives amend understand your issue and expedite its resolution. To accept a screenshot, click your operating system (beneath) and follow the step-by-step instructions:
- Windows x
- Windows 8
- Windows 7 / Vista
- Windows XP
- Mac Os X
- Android
Windows 10
Have a screenshot using your keyboard- Press the Windows cardinal
 + PrintScreen on your keyboard (or, PrtSc). Screenshots are automatically saved to Pictures/Screenshots in your user directory (C:/User s/%username%/Pictures/Screenshots by default).
 - To access your screenshot, printing the Windows fundamental + East to open an explorer window and scan to Pictures/Screenshots.

Effigy 1-i
Click the paradigm to view larger in new window
Have a screenshot using the Snipping Tool:
- Press Windows central + Q to search for apps, type Snipping Tool into the Search bar and then click Snipping Tool.

Figure 1-ii
Click the paradigm to view larger in new window
- Click New or select the type of screenshot (snip) y'all want to take using the drop-downwards card (default is Rectangular Snip).
Effigy 1-3
- Click and drag your cursor over the area yous desire to capture.
- The Snipping Tool editor will automatically open. Click the diskette icon and select a salvage destination for your screenshot. Select a file type (we recommend .png for emails to ESET Technical back up) and click Salve.
- If necessary, adhere your screenshot to an electronic mail response to ESET Technical Back up.
Windows 8
Accept a screenshot using your keyboard- Press the Windows central
 + PrintScreen on your keyboard (or, PrtScr). Screenshots are automatically saved to My pictures/Screenshots in your user directory (C:/User s/%username%/My Pictures/Screenshots by default).
 - To access your screenshot, press the Windows key + Due east to open an explorer window and browse to My pictures/Screenshots.
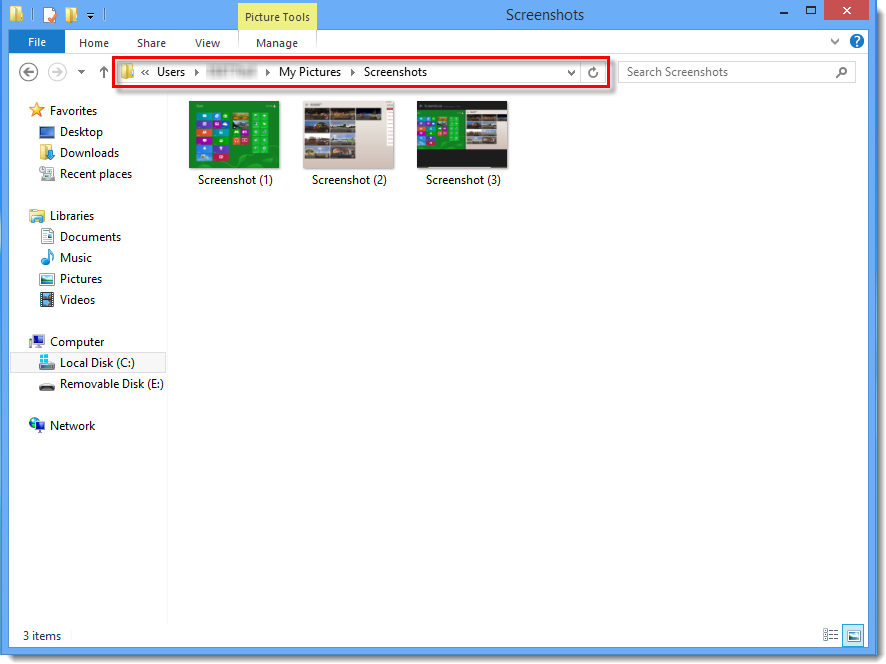
Figure two-1
Click the image to view larger in new window
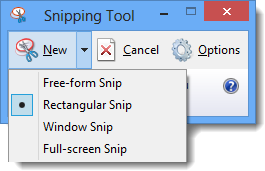
Take a screenshot using the Snipping Tool:
- Press Windows key + Q to search for apps, blazon Snipping Tool into the Search bar and then click Snipping Tool.
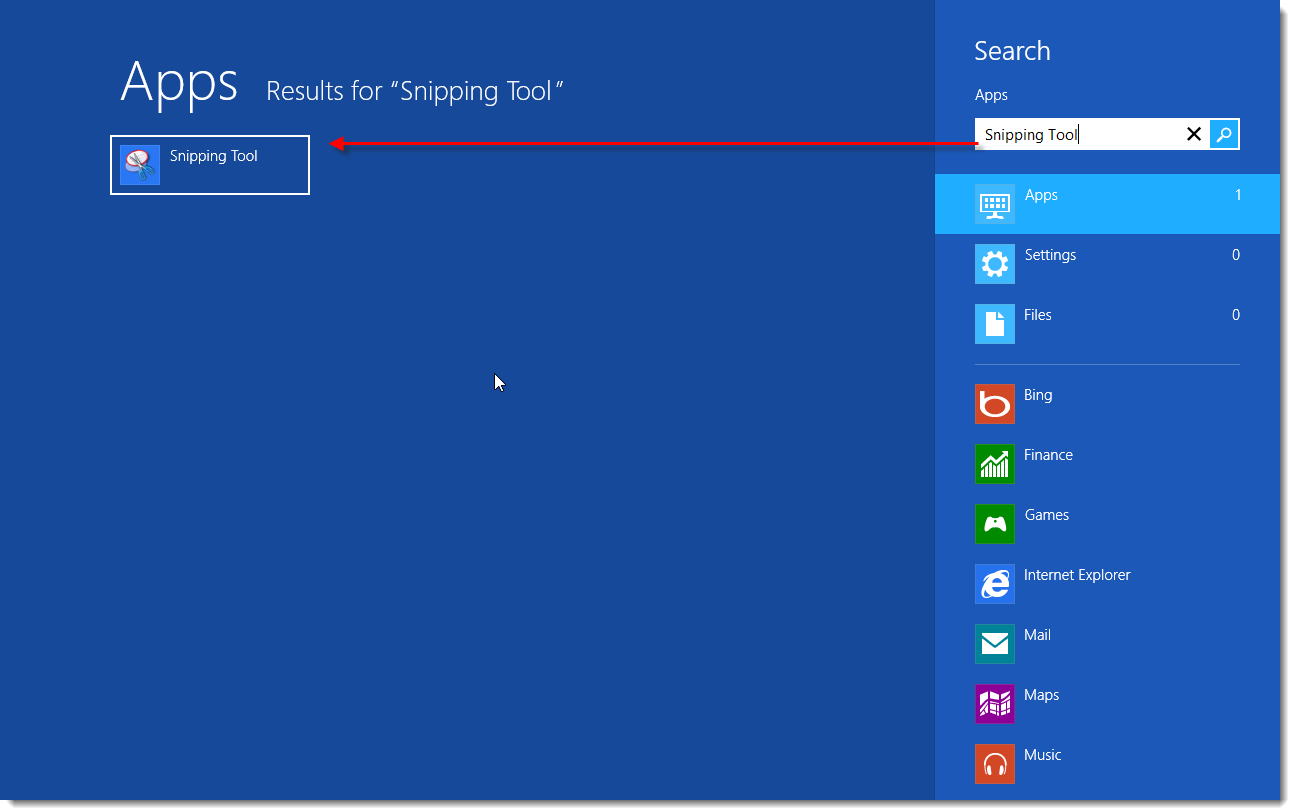
Figure 2-2
Click the image to view larger in new window
- Click New or select the type of screenshot (snip) you want to have using the drop-down menu (default is Rectangular Snip).
Figure 2-3
- Click and drag your cursor over the area you want to capture.
- The Snipping Tool editor will automatically open up. Click the diskette icon and select a save destination for your screenshot. Select a file type (we recommend .png for emails to ESET Technical Support) and click Salvage.
- If necessary, attach your screenshot to an email response to ESET Technical Back up.
Windows seven / Vista
Take a screenshot using your keyboard:
- Printing PrintScreen on your keyboard (or, PrtScr) to capture your entire screen. To capture only the agile window, press Alt + PrintScreen on your keyboard.
- Paste your screenshot into a program such every bit Microsoft Paint to save information technology: to open Microsoft Paint, click Showtime → All Programs → Accessories → Pigment.
- Select Paste from the Edit card, or press Ctrl + Five on your keyboard.
- Click File → Save Every bit... and select a save destination for your screenshot. Select a file type (we recommend .png for emails to ESET Technical Back up) and click Save.
- If necessary, attach your screenshot to an email response to ESET Technical Support. Practice NOT copy/paste your screenshot into the body of your email to ESET Technical Back up.
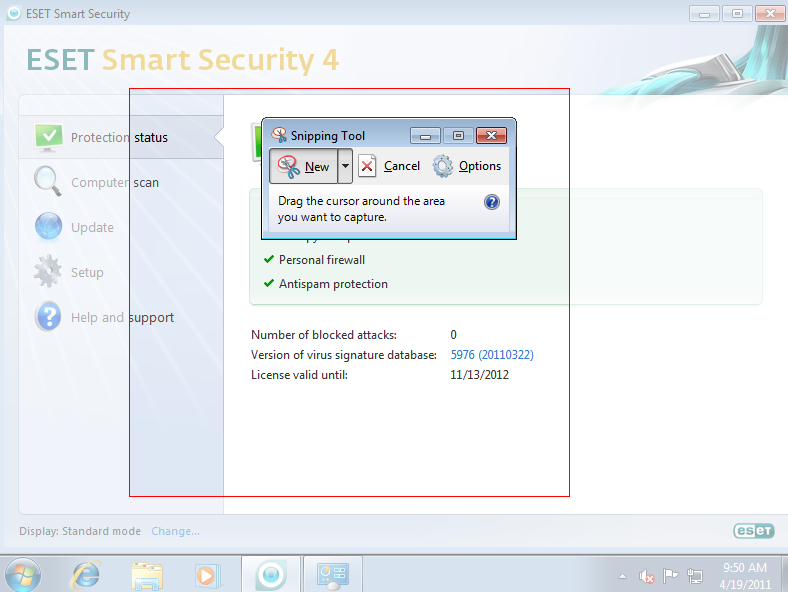
Take a screenshot using the Snipping Tool:
- Open the Showtime Menu and click All Programs → Accessories → Snipping Tool.
- Click New or select the type of screenshot (snip) y'all desire to accept using the drop-down card (default is Rectangular Snip).
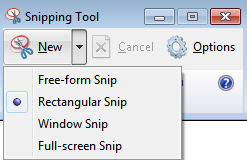
Figure iii-1
- Click and drag your cursor over the area y'all would like to capture.
Effigy 3-two
- The Snipping Tool editor will automatically open up. Click the diskette icon and select a save destination for your screenshot. Select a file blazon (we recommend .png for emails to ESET Technical Back up) and click Save.
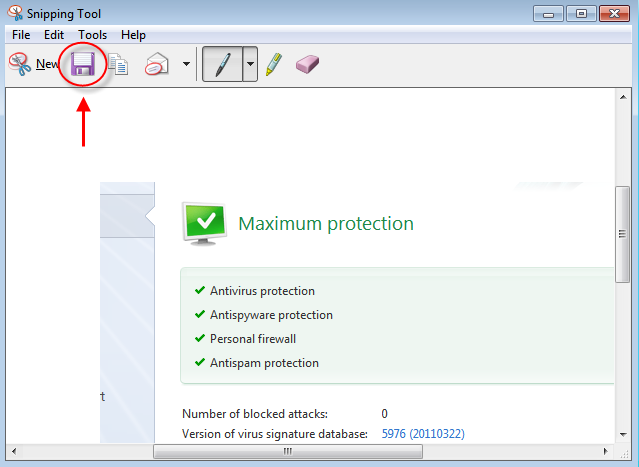
Figure 3-3
- If necessary, attach your screenshot to an email response to ESET Technical Support.
Windows XP
Have a screenshot using your keyboard:
- Press PrintScreen on your keyboard (or, PrtScr) to capture your entire screen. To capture a specific area of a given window, printing Alt + PrintScreen on your keyboard.
- Paste your screenshot into a program such as Microsoft Pigment to salvage it: to open Microsoft Paint, click Start → All Programs → Accessories → Paint.
- Select Paste from the Edit menu, or press Ctrl + V on your keyboard.
- Click File Save As... and select a save destination for your screenshot. Select a filetype (we recommend .png for emails to ESET Technical Support) and click Save.
- If necessary, adhere your screenshot to an electronic mail response to ESET Technical Back up.
Mac OS X
Take a screenshot using your keyboard:
- Press Command + Shift + iii on your keyboard: This takes a screenshot of your entire screen including screens from multiple monitors and automatically saves the file to your desktop. The file will be named "Screen shot" followed by the date and time.
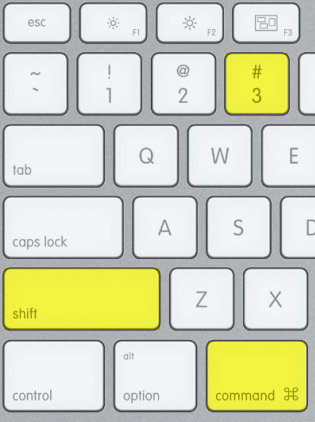
Figure 4-1
- If necessary, adhere your screenshot to an e-mail response to ESET Technical Support.
Android
Android four.0 (Ice Foam Sandwich) and later
Press and hold the Power and Volume downwards buttons at the same time until an animation plays to bespeak that your screen has been saved.
Last Updated: Mar 4, 2022
Additional resource
Source: https://support.eset.com/en/kb2727-how-do-i-take-a-screenshot#:~:text=support%20request%20form.-,Windows%207%20%2F%20Vista,Alt%20%2B%20PrintScreen%20on%20your%20keyboard.
Posted by: lieberknespolow.blogspot.com
0 Response to "How To Screen Capture In Windows Vista"
Post a Comment