

How To Clear Trash On Macbook Pro
Deleting a file on your Mac moves it to the Trash folder. This way, if you accidentally deleted something, you can find it in the Trash and restore it without needing to worry. But it's also important to empty the Trash occasionally, to avoid it taking up too much storage on your Mac.
When you empty the Trash, your Mac permanently deletes all those files, creating free space for you to use with new files instead.
In this article, we'll show you how to:
- Empty the Trash on a Mac
- Remove individual files from the Trash
- Automatically empty the Trash
- Force delete files from the Trash
5 ways to empty the Trash on a Mac
There are multiple ways to empty the Trash on your Mac. When you do so, your Mac permanently deletes every file in the Trash, so you should make sure you don't want to recover deleted files from the Trash before you do it.
Each option ends up with the same result, so the best method to use depends on your particular workflow.
Here are all the ways to empty the Trash on your Mac:
- Control-click the Trash icon on the Dock and select Empty Trash
- Open the Trash folder and click Empty in the upper-right corner
- Control-click anywhere in the Trash folder and select Empty Trash
- From any Finder window, go to Finder > Empty Trash from the menu bar
- While using Finder, Shift + Command + Delete

No matter which of the above methods you use, you'll see a confirmation window appear asking if you're sure you want to empty the Trash. You can usually bypass this confirmation popup by holding Option while you empty the Trash.

How to delete individual items from the Trash
If you don't want to remove everything from the Trash in one go, you can choose to remove individual files instead. Just like emptying the entire Trash, when you do this your Mac permanently deletes those files, so make sure you definitely don't need them first.
To delete individual files from the Trash on a Mac:
- Open the Trash folder
- Click to select the file you want to remove; press and hold Command to select multiple files at once
- Control-click on your selected file, then choose Delete Immediately

If you already know you want to permanently delete a file or folder from your Mac, you can actually bypass the Trash entirely. To do this, select the file using Finder and press Command + Option + Delete. The file will immediately vanish from your Mac, without going into the Trash first.
How to automatically empty the Trash on a Mac
You might run out of free space on your Mac if you don't empty the Trash regularly. To stop this from happening, tell your Mac to automatically empty the Trash instead.
When you enable this option, your Mac only keeps files in the Trash for 30 days, after which it automatically removes them. Of course, you should only use this option if you're certain you won't need to recover anything from the Trash after 30 days have passed.
To make your Mac automatically empty the Trash:
- Open Finder and go to Finder > Preferences from the menu bar
- Go to the Advanced tab
- Enable the option to Remove items from the Trash after 30 days

Any files you move to the Trash from iCloud will automatically get deleted after 30 days whether you enable this option or not. This is because iCloud only ever keeps deleted files for 30 days.
MacKeeper cleans your Trash automatically
If you're worried about running out of space on your Mac, you could also use MacKeeper to empty the Trash and clean up other junk files on your Mac automatically.
With its Auto-scan feature, MacKeeper will scan your Mac every day looking for new files to clean up your Mac. In addition, the Auto-scan will detect potential viruses or privacy flaws.
How to force empty the Trash on a Mac
If you can't empty the Trash on your Mac for some reason, you might need to follow a few troubleshooting steps to force it to empty. The most common reason that the Trash won't empty on a Mac is because some of the files are currently in use. But you might also encounter issues if you're trying to delete system-protected files.
Try any of these troubleshooting tips if you can't empty the Trash on your Mac:
- Use the keyboard shortcut Command + Q to quit every app except Finder
- Restart your Mac by going to Apple > Restart from the menu bar
- Boot your Mac into Safe Mode by holding Shift while it powers up
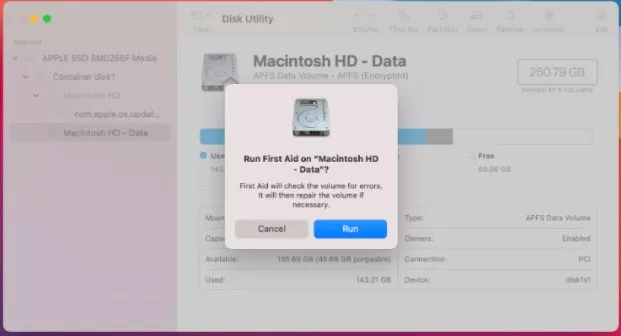
- Boot into Recovery Mode by holding Command + R while your Mac powers up, then open Disk Utility, select your storage drive, and run First Aid
Disable System Integrity Protection to remove certain files
You may need to disable System Integrity Protection (SIP) to delete certain files from the Trash, like Time Machine backups. SIP is part of your Mac's security system, so you must enable SIP again after emptying the Trash.
Follow these steps to disable SIP if you still can't empty the Trash:
- Boot into Recovery Mode by holding Command + R while your Mac powers up
- From the macOS Utilities page, select Utilities > Terminal from the menu bar
- Type the following Terminal command: csrutil disable
- Press Enter and type your Mac administrator's password to run the command
- Restart your Mac, then empty the Trash
- To enable SIP again: Boot back into Recovery Mode and open the Terminal, then run the following command: csrutil enable
How to securely empty the Trash on a Mac
When you empty Trash in the usual way, your Mac doesn't actually remove all your files. Instead, it just hides them and marks the data to be available for overwriting.
This means it might still be possible for data recovery experts to restore deleted files even after you empty the Trash. But on the flip side, it could also pose a security risk if you're working with highly confidential files.
Apple used to include an option to Secure Empty Trash in macOS, which replaced the deleted information with meaningless data, making it nearly impossible to recover your deleted files.
If you're still running Mac OS X Yosemite or earlier, you can still use this option by opening Finder and selecting Finder > Secure Empty Trash from the menu bar.
If you've still got privacy concerns about your deleted data, you can encrypt your Mac using FileVault to add an extra layer of protection.
Read more:
- How to Correctly Uninstall Apps from Your Mac
- 5 Easy Ways to Free Your Mac of Junk Files
- The Best Ways to Find and Delete Duplicate Photos on a Mac
- How to Delete Pictures on a Mac
Written By
With over 5 years of supporting Mac users, Ruslana lives and breathes everything Mac. Tech expert, Apple lover, and well, a cutie. Say hi on LinkedIn!
With over 5 years of supporting Mac users, Ruslana lives and breathes everything Mac. Tech expert, Apple lover, and well, a cutie. Say hi on LinkedIn!
How To Clear Trash On Macbook Pro
Source: https://mackeeper.com/blog/how-to-empty-trash-on-mac/
Posted by: lieberknespolow.blogspot.com
0 Response to "How To Clear Trash On Macbook Pro"
Post a Comment